MS SQL Server
MS SQL Server
Learn how to connect your MS SQL Server database to your platform by configuring the necessary source settings. This guide simplifies the connection process to ensure your data integration is set up quickly and accurately.
SQL Server Connection Setup
To test and establish a successful connection to SQL Server, it is essential to have an active and accessible SQL Server database. This database can be hosted on:
- Local server (your own machine)
- Remote server (company internal network)
- Any database management system that supports SQL Server
Required Connection Details
Before configuring the connection in the application, make sure you have the following information available:
-
Server / Host:
The IP address or server name where the database is hosted. -
Port:
SQL Server connection port (default: 1433). This may vary depending on the server configuration. -
Database Name:
The exact name of the database you want to connect to.
Examples:mi_empresa_db,inventory,sales2025 -
Username:
A username with permission to access the database.
Examples:admin,usuario_app,sa(admin) -
Password:
The password corresponding to the specified user.
Pre-Verification
Before configuring the connection in the application, we recommend verifying that these details are correct by connecting through any SQL client or database management tool that supports SQL Server connections.
Once you have confirmed that you can connect using these tools, you can configure the connection in the application using the same credentials.
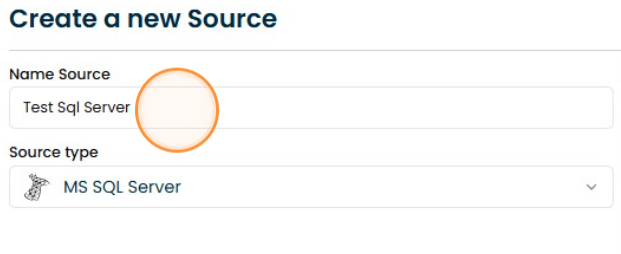
1. Select the source type:
Fill the source name and select the MS SQL Server option from the source type dropdown menu.
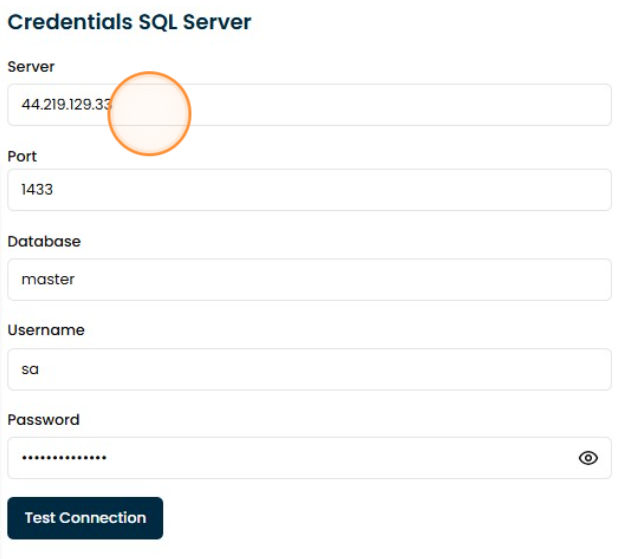
2. Configure the connection:
Fill the connection settings:
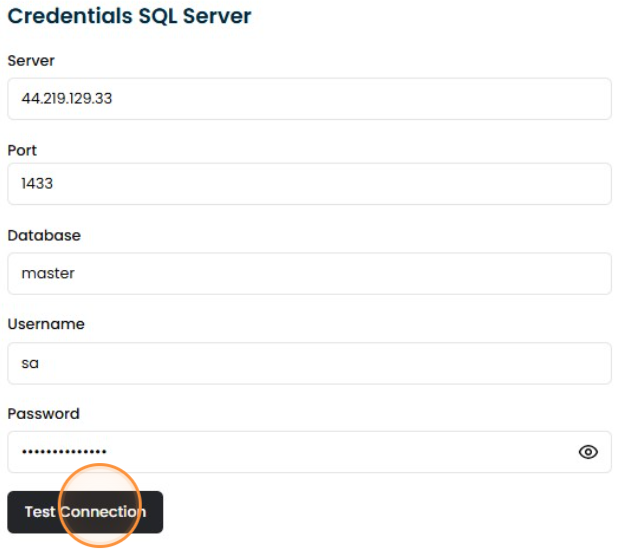
3. Test the connection:
Click the "Test connection" button to verify that the connection is working properly.
4. Save the connection:
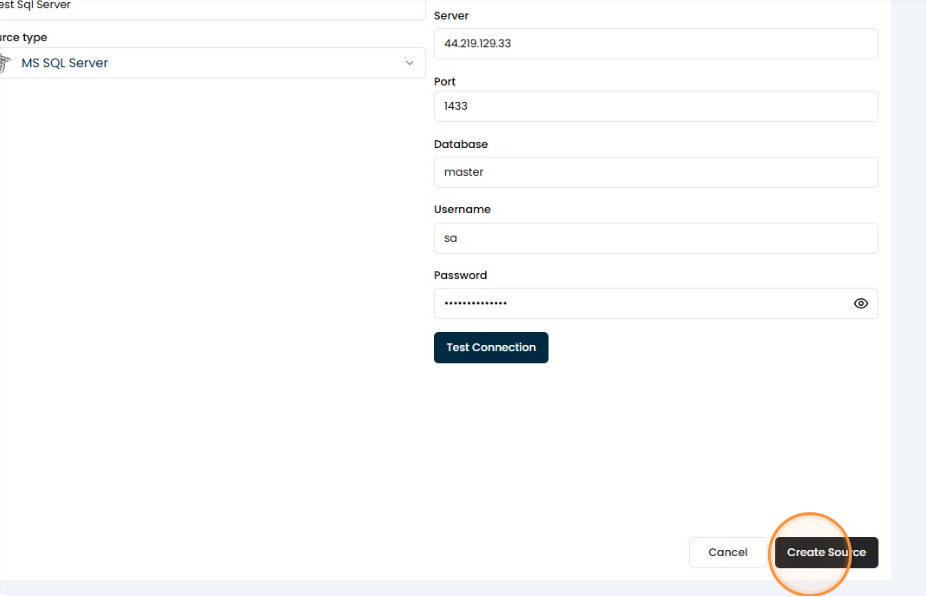
Click the "Create Source" button to save the connection.