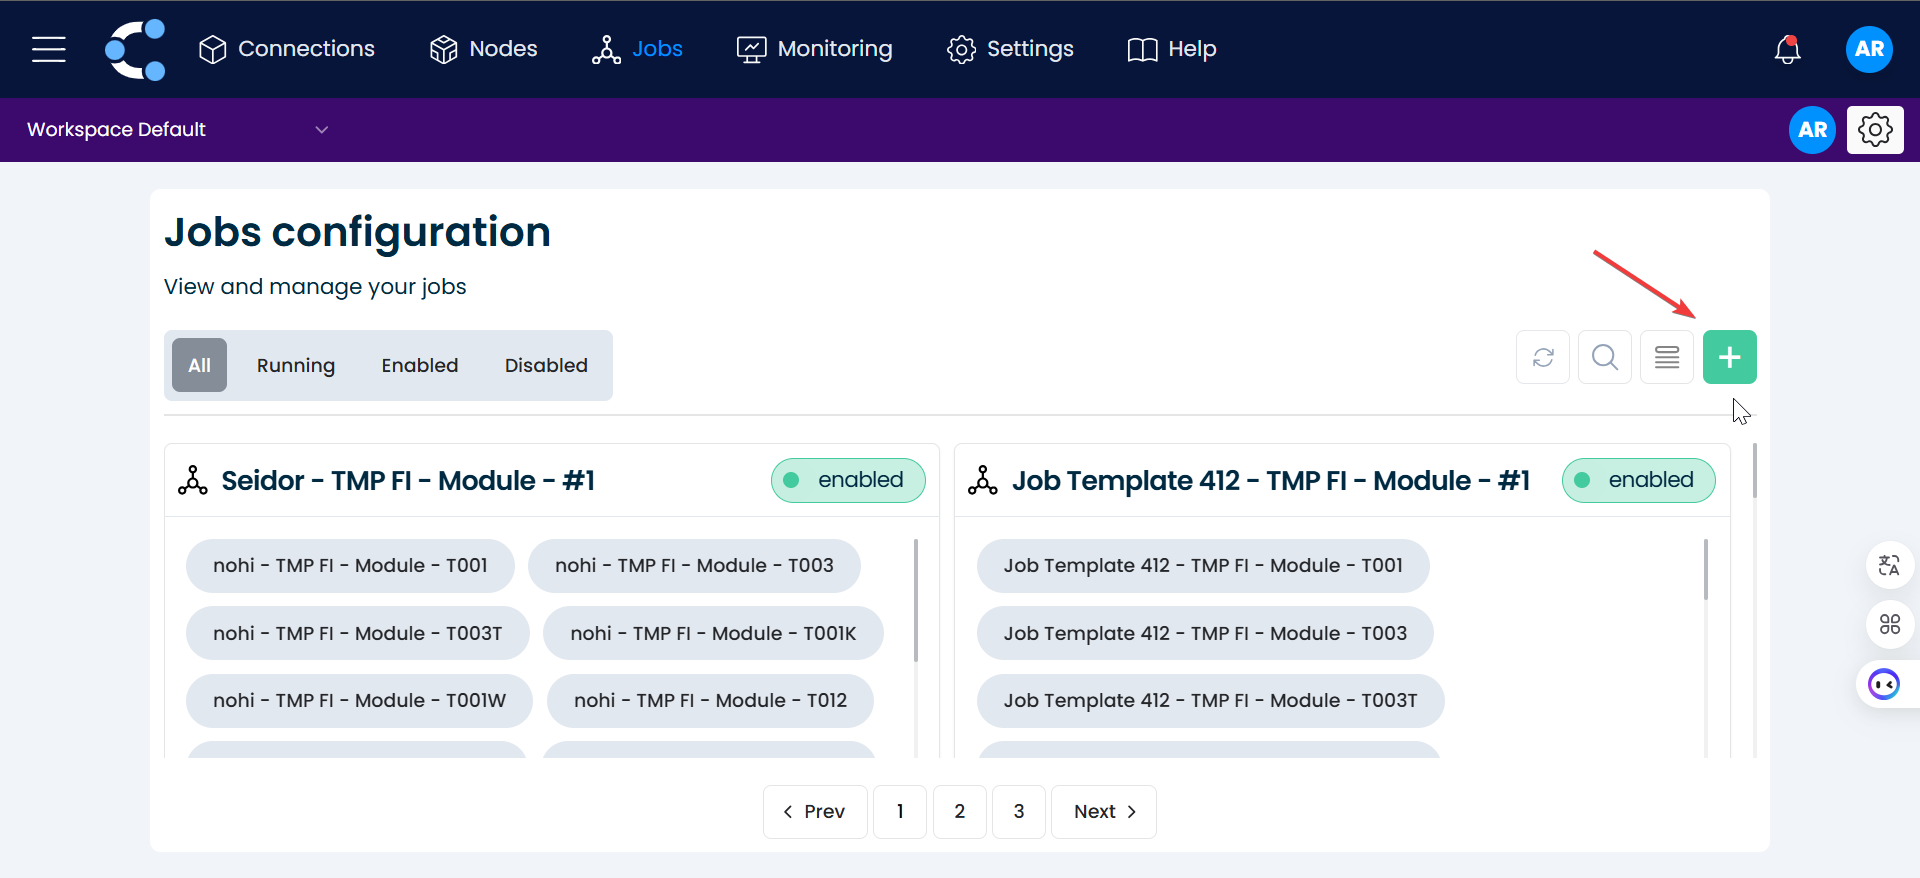
New Job
New Job
Steps to create a Job:
1.Start a New Job
Click on the green button with the "+" symbol.
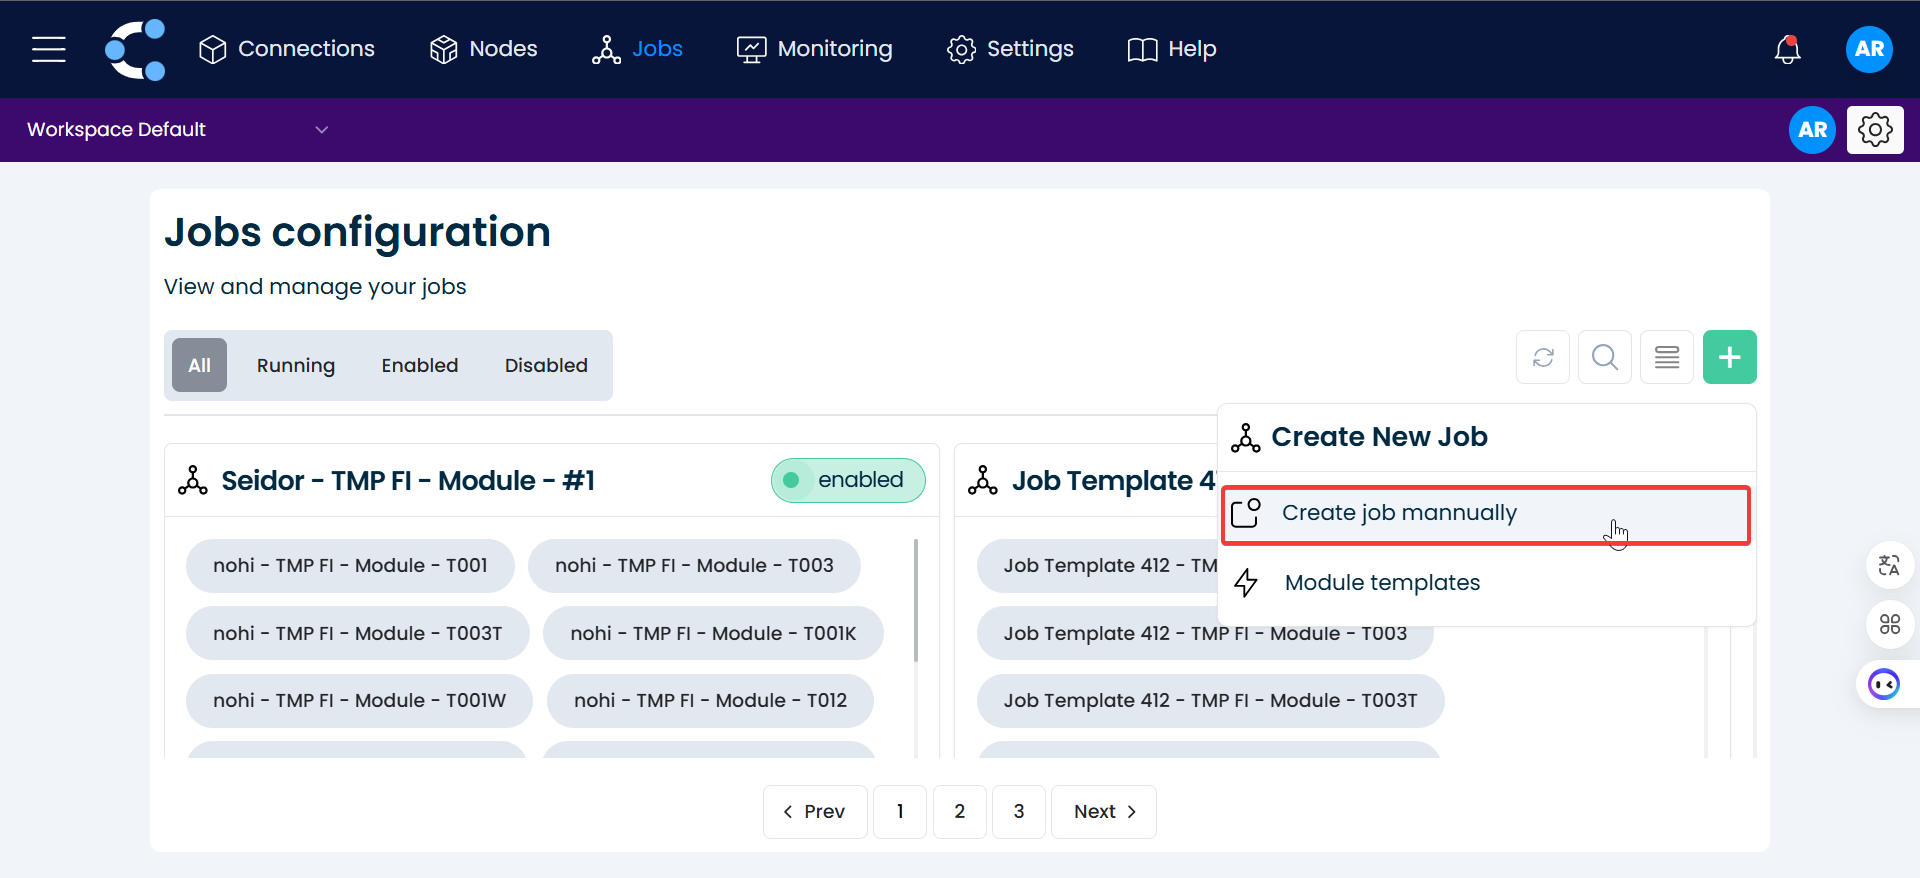
2. Select Manual Job Creation
Choose "Create job manually" from the available options.
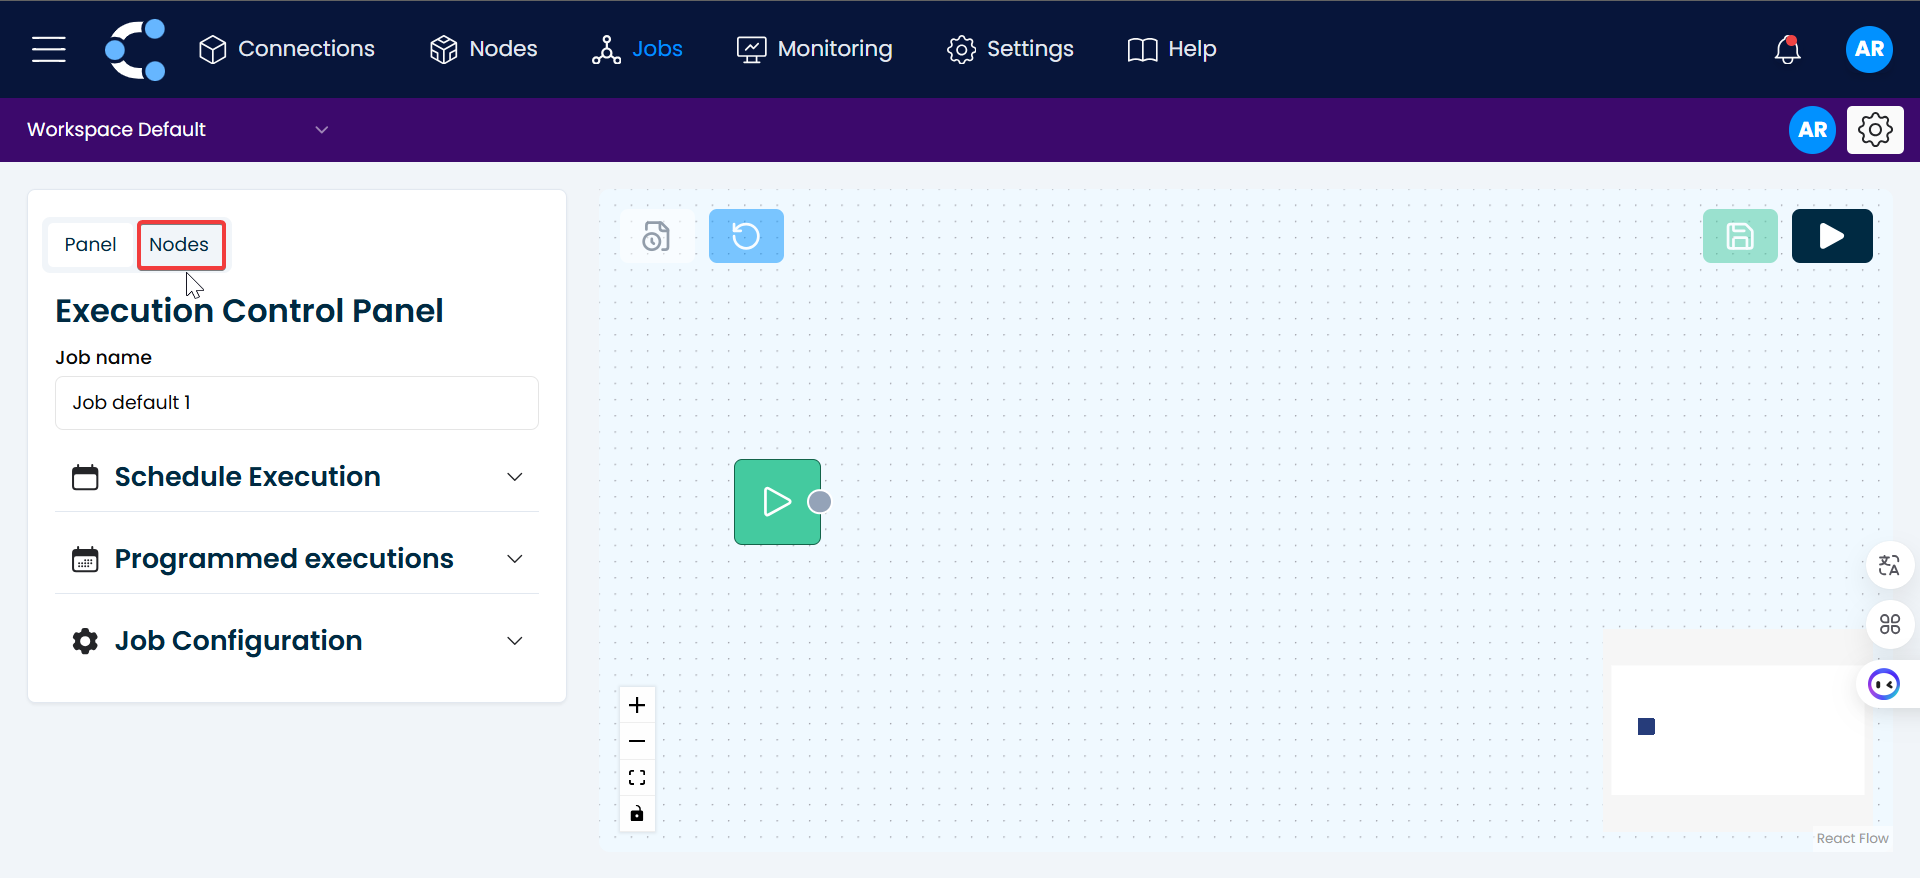
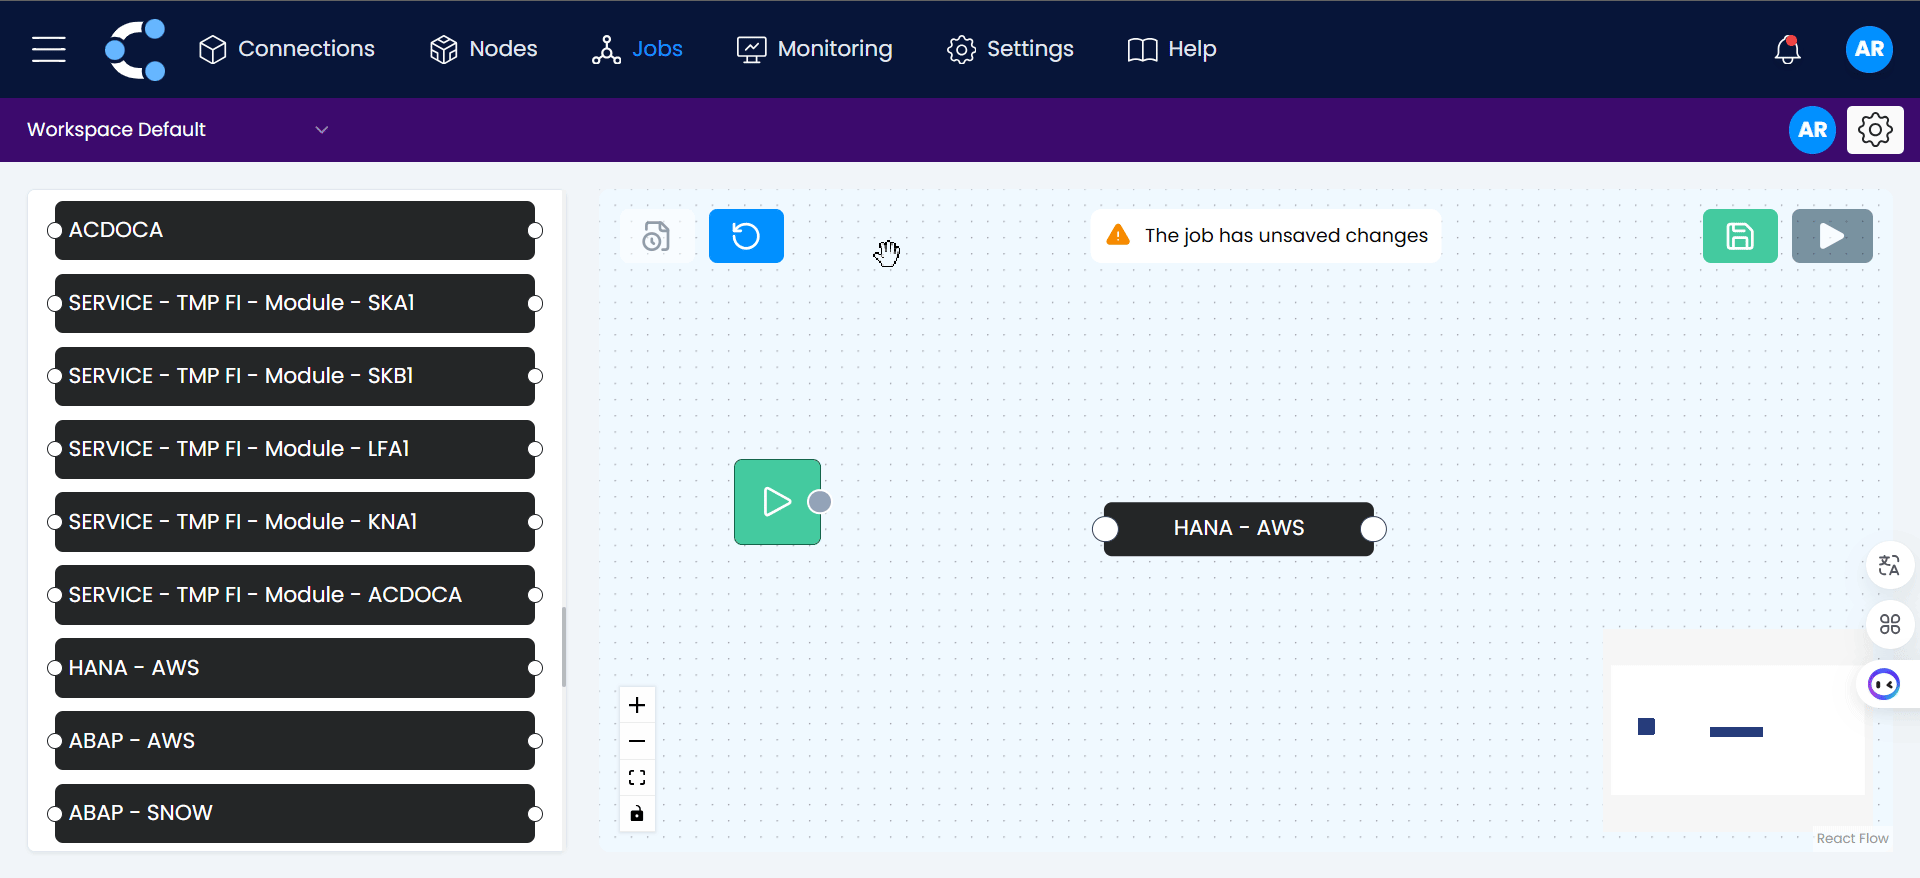
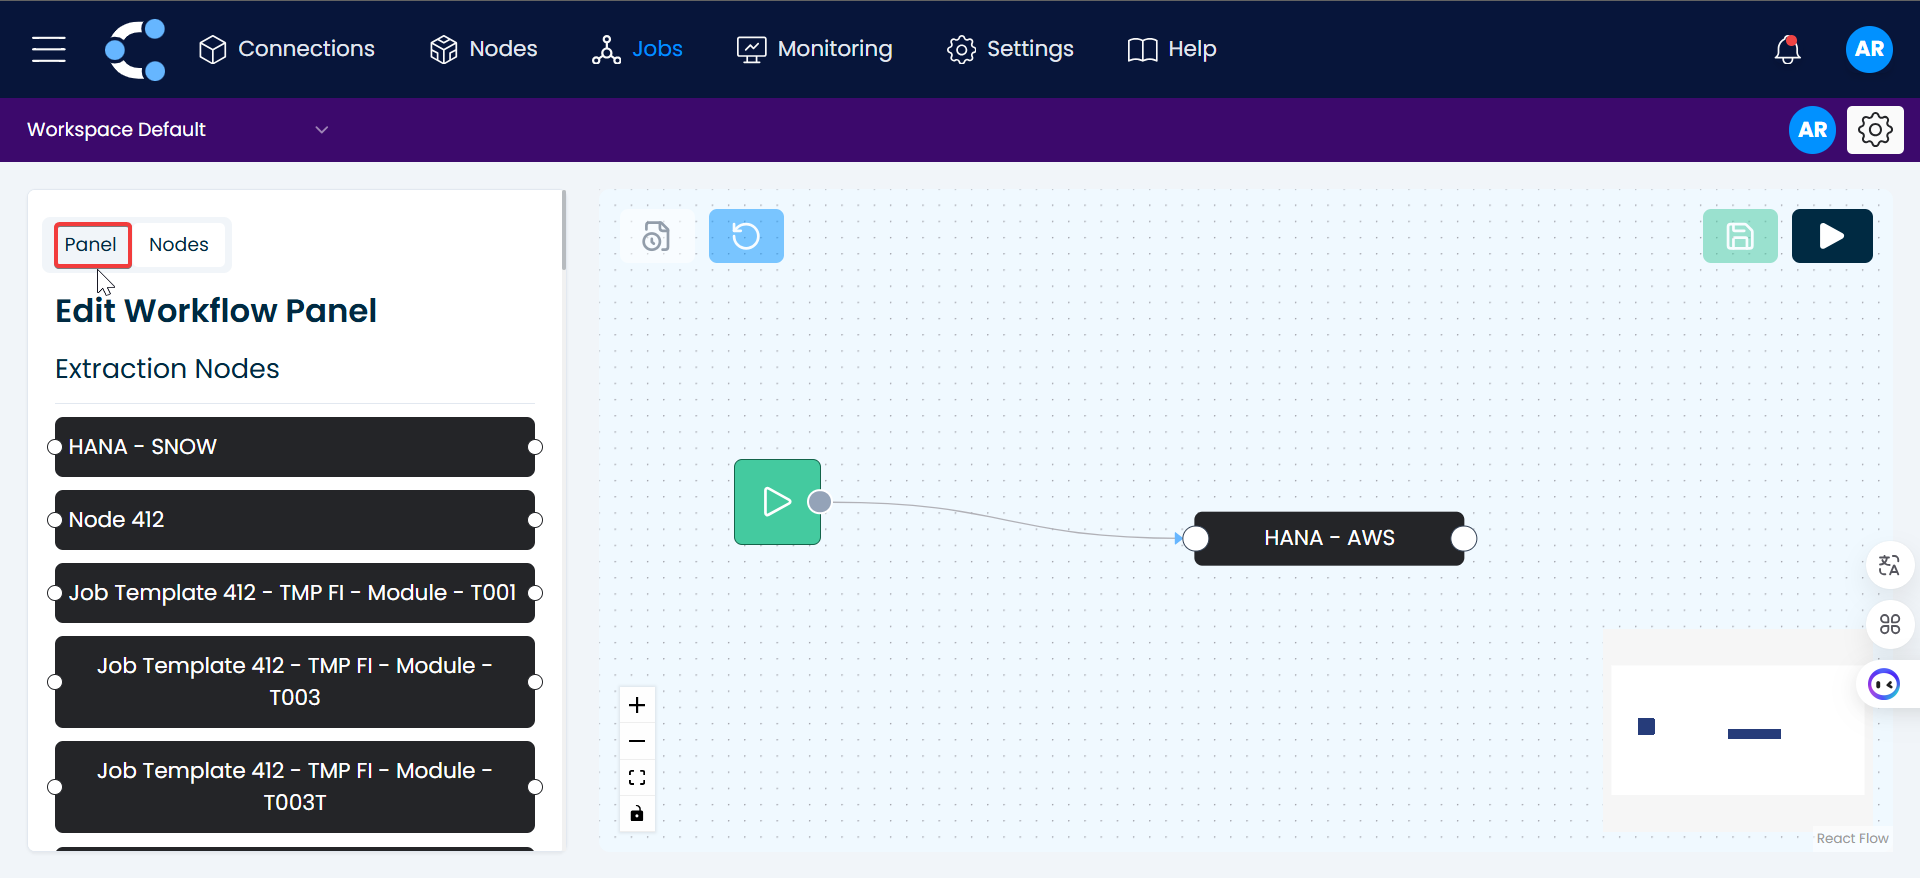
3. Click on "Nodes".
4.Add Control and Extraction Nodes
Select the control node and drag it to the right, along with the extraction nodes you need.
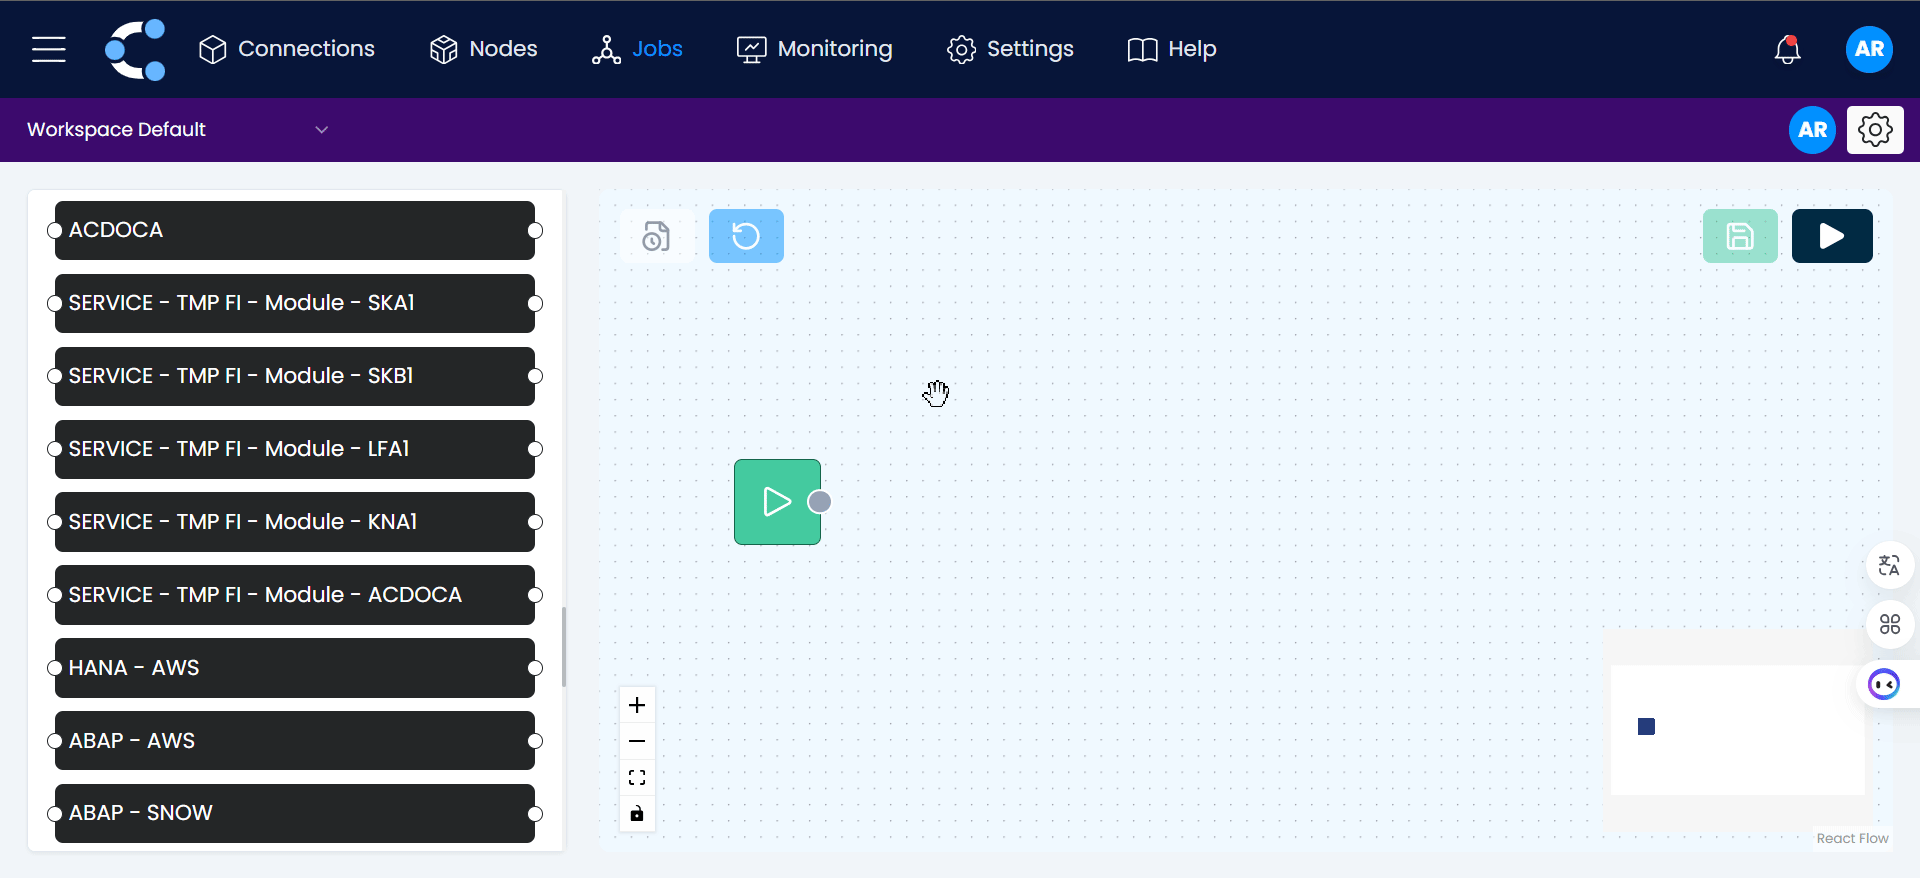
4. Link the nodes.
Connect the nodes by dragging from one to another, defining the flow of execution.
5. Save Your Job Structure
Click the green button to save the changes.

6. Click on "Panel".
7. Set a Job Name
Go to the "Panel" section and update the job name for easy identification.
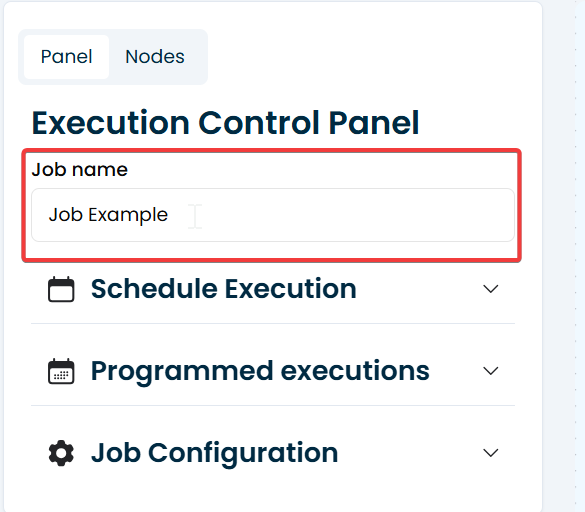
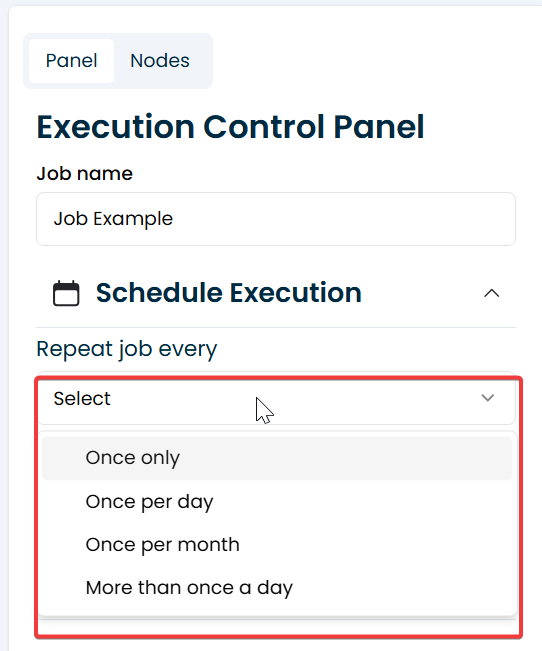
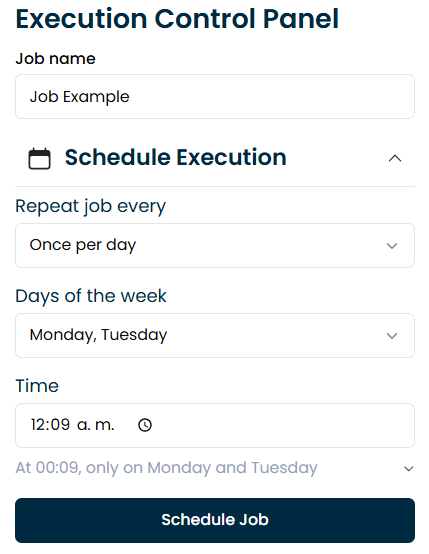
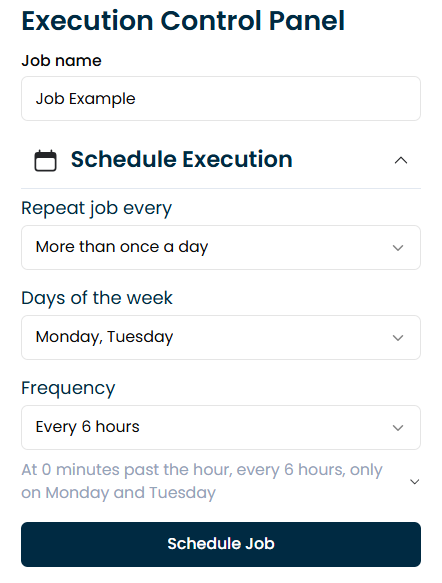
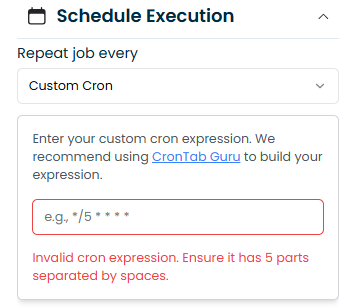
8. Schedule Execution
Click on "Schedule Execution" to configure how often the job should run. Depending on the selected option, you'll be able to define specific scheduling parameters.
Scheduling Options
- Once Only
- Once per Day
- Once per Month
- More than Once per Day
- Custom Cron
Run the job only one time at a specific date and time.
Run the job once per day. Select the days of the week and the time it should run.
Run the job once per month. Choose the day of the month and the execution time.

Run the job multiple times per day. Select the days of the week and define how often it should repeat within a day.
Use a standard cron schedule expression to define custom execution intervals. This method is ideal for users familiar with cron syntax who need precise control over the schedule.
9. Confirm the Scheduling
Once you’ve defined the execution schedule, click on "Schedule Job" to finalize and activate it. And that's it! The job with the scheduled execution has been successfully created.