SMTP
SMTP
What is it?
By default, Crestone sends its emails (alerts, notifications, etc.) through the product's own
mechanism, from the address noreply@crestone... — no configuration is required for emails to
work out of the box.
The SMTP section lets you replace that default sending mechanism with your own company's SMTP server, so Crestone's emails go out from your own domain/configuration instead of the default sender.
If your configured SMTP server ever fails, Crestone automatically falls back to the default
mechanism (noreply@crestone...), so email delivery isn't interrupted.
This setting applies at the tenant level (your company), not per workspace: if your company has several workspaces, they all share the same SMTP configuration.
Configure your own SMTP
1. Go to Settings
Go to Settings → Configure SMTP.

2. Enable and edit
Turn on the switch (Active) and click Edit to see the form.

3. Fill in the server details
- Host: address of the SMTP server (e.g.
email-smtp.us-east-1.amazonaws.com). - Port: port of the SMTP server (e.g.
587for TLS,465for SSL). - User: account used to authenticate against the SMTP server.
- Password: password for that account.
- Admin email: address shown as the sender of the emails.
- Sender name: display name shown next to the sender email (e.g. "Crestone Alerts").
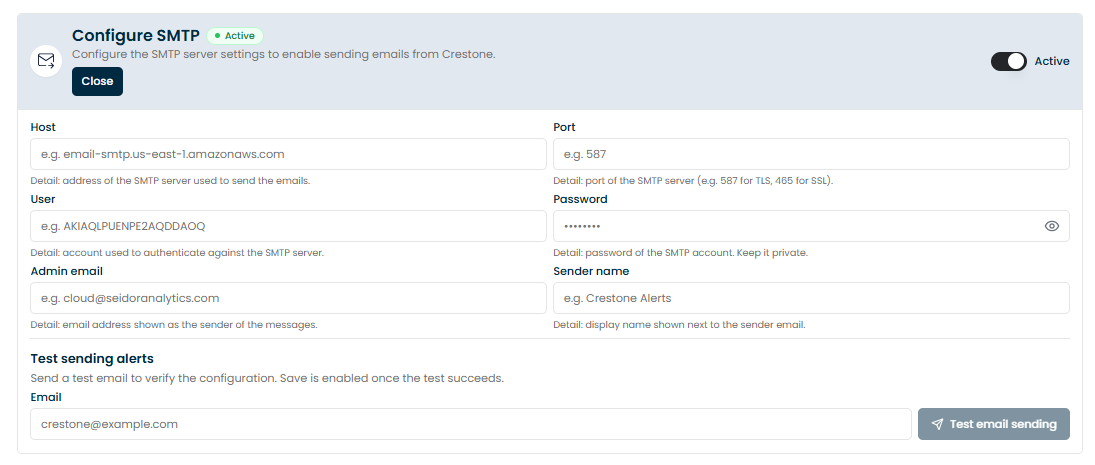
4. Test sending
Before you can save, you need to send a test email: fill in Email (the test's destination address) and click Test email sending. The Save button only appears once the test email is sent successfully.

5. Save
Once the test succeeds, click Save changes.