Node
Node
Getting Started
Before creating a node, you must have at least one Source and one Destination already configured. These connections are essential, since every node relies on them to synchronize and transfer data effectively.
👉 Make sure both the Source and Destination. are properly set up before proceeding with node creation.
Create new Node
Steps to create a Node:
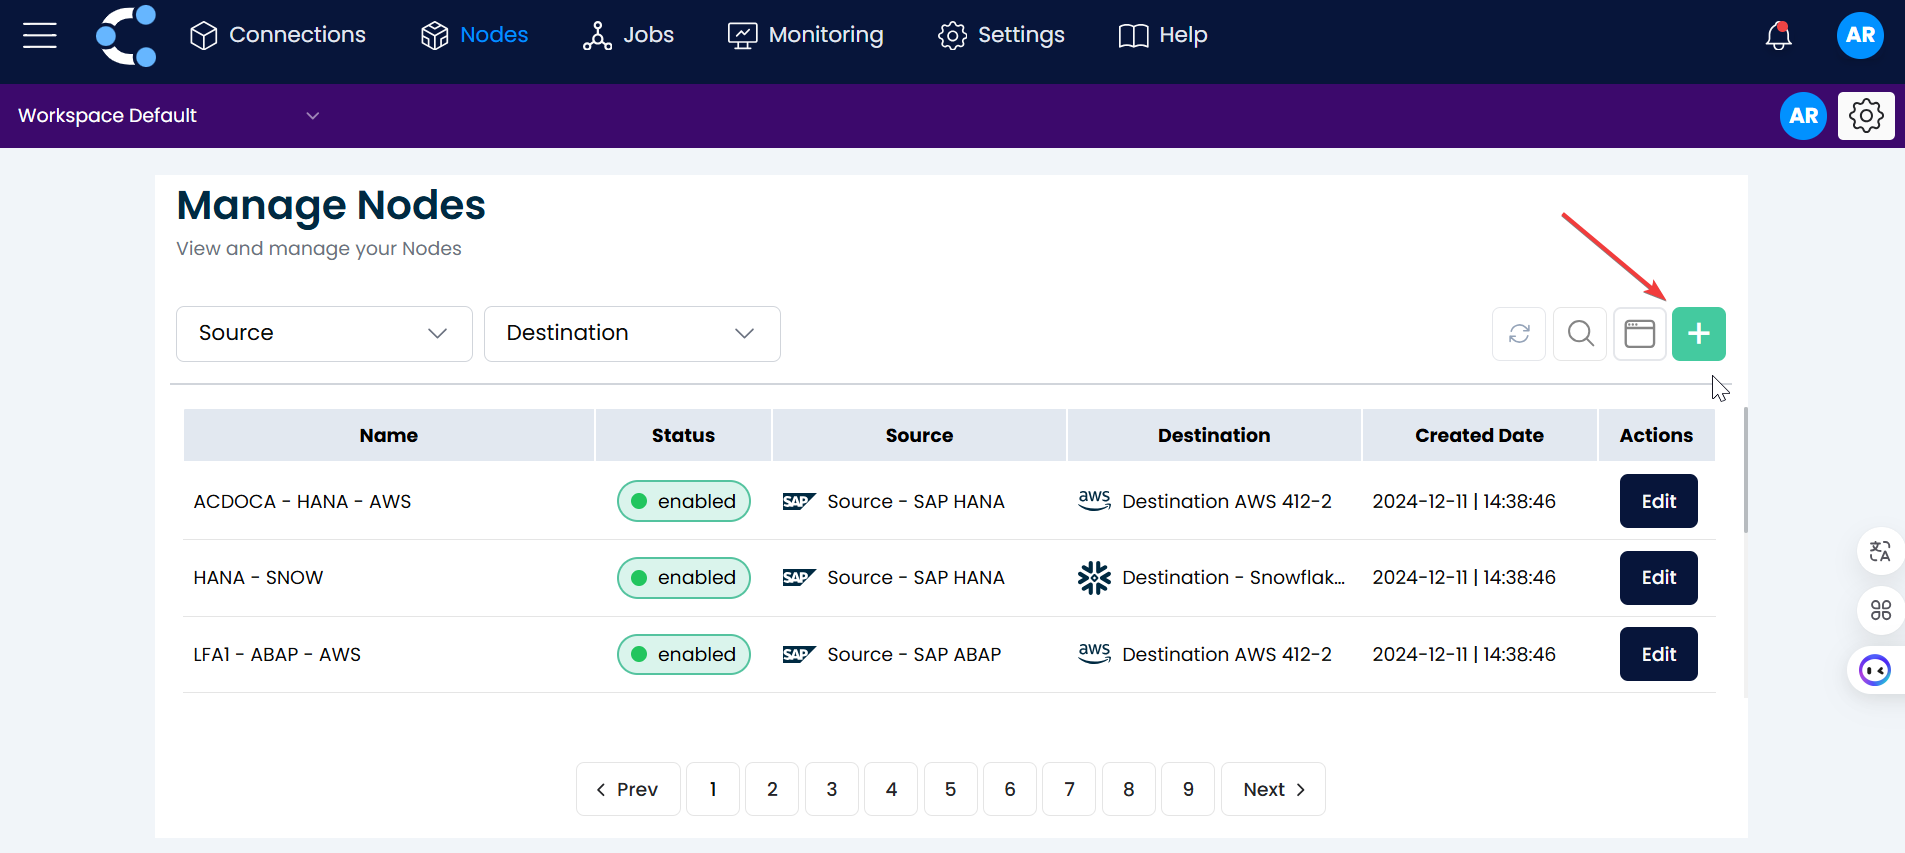
1. Start a New Node
Click on the green button with the "+" symbol.
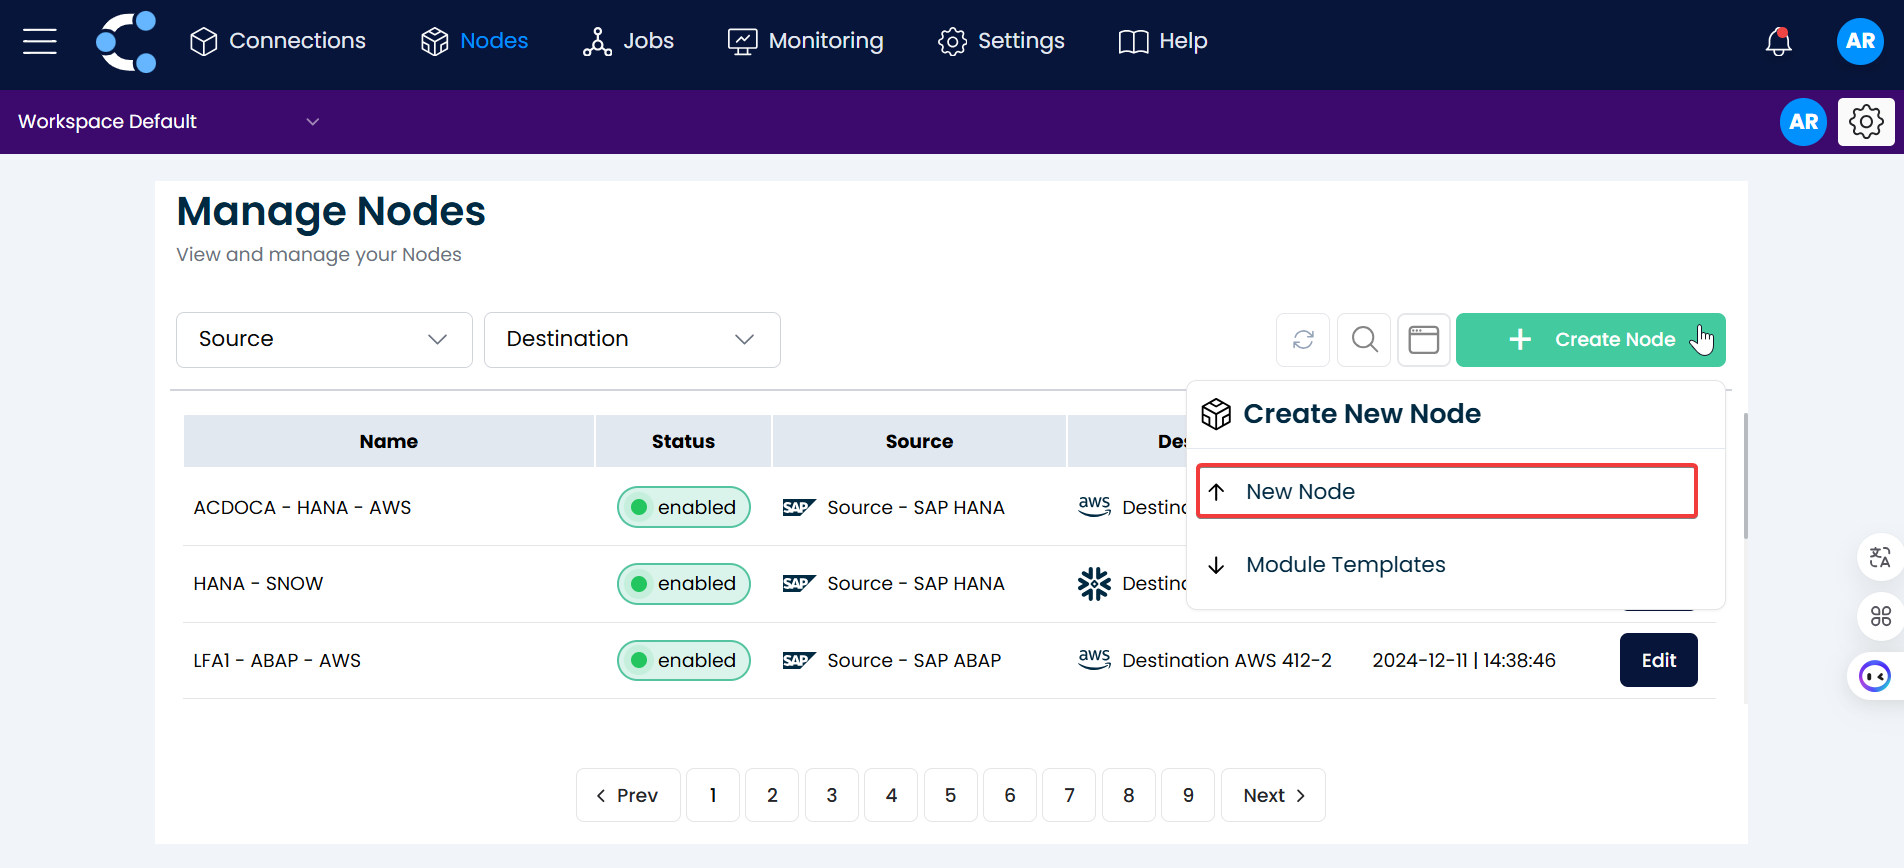
2. Select "New Node".
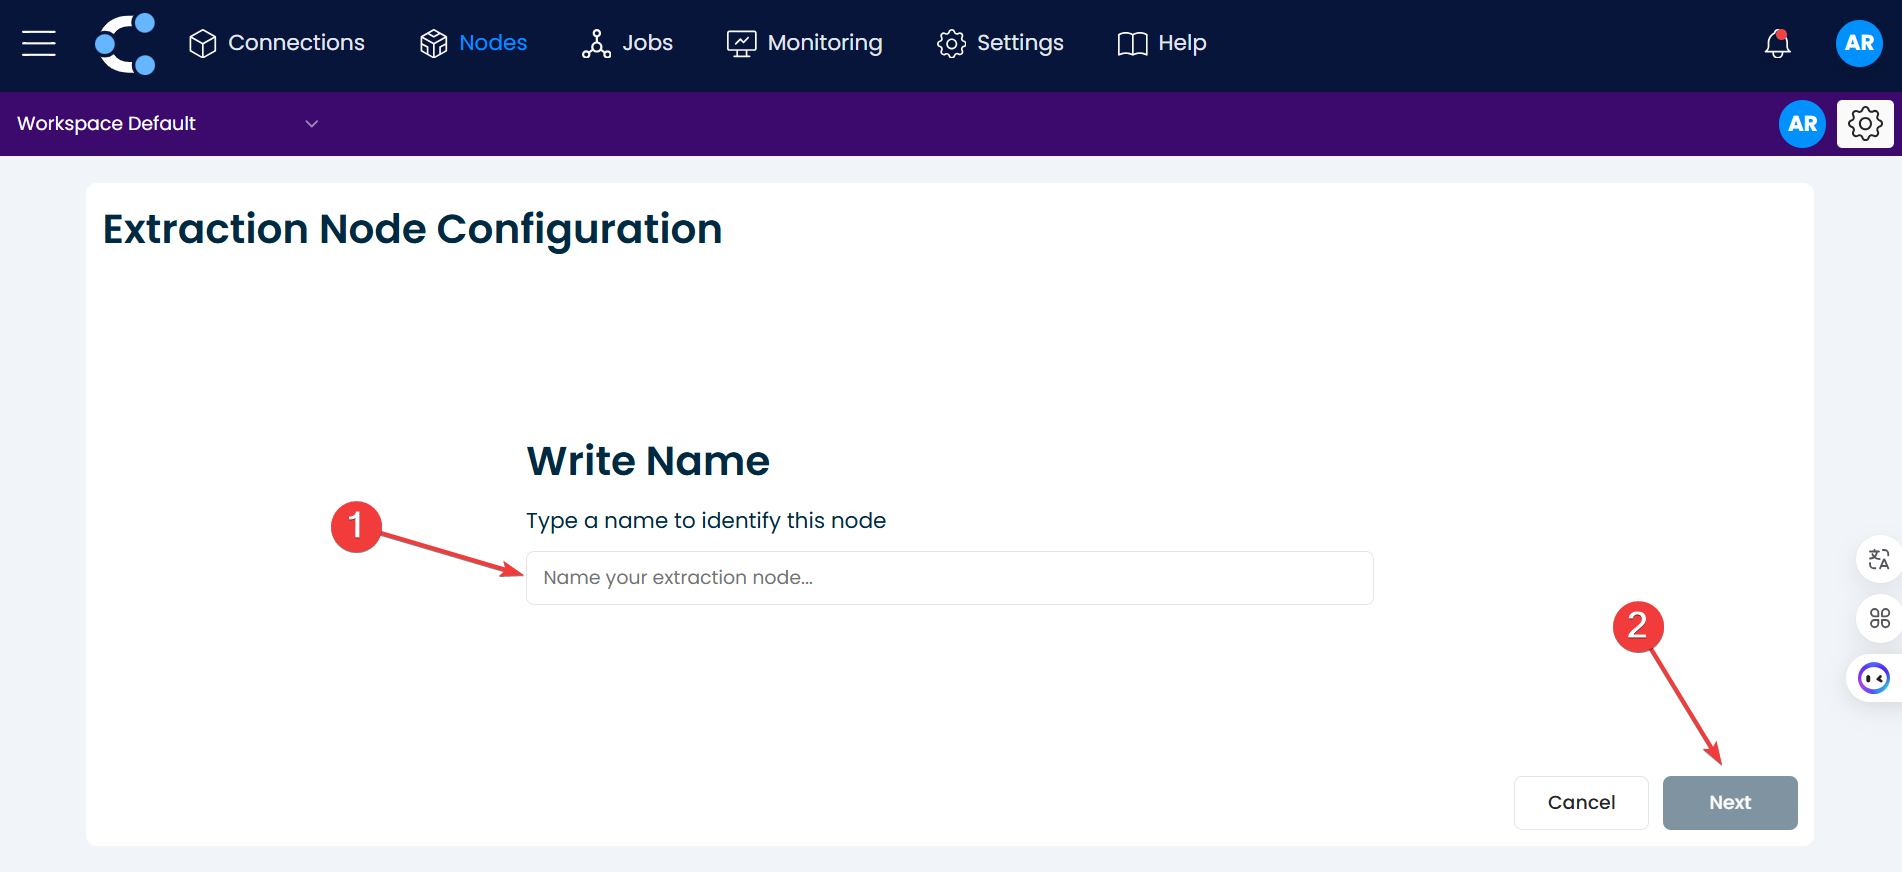
3. Naming
Enter the name of the new node and click the "Next" button.
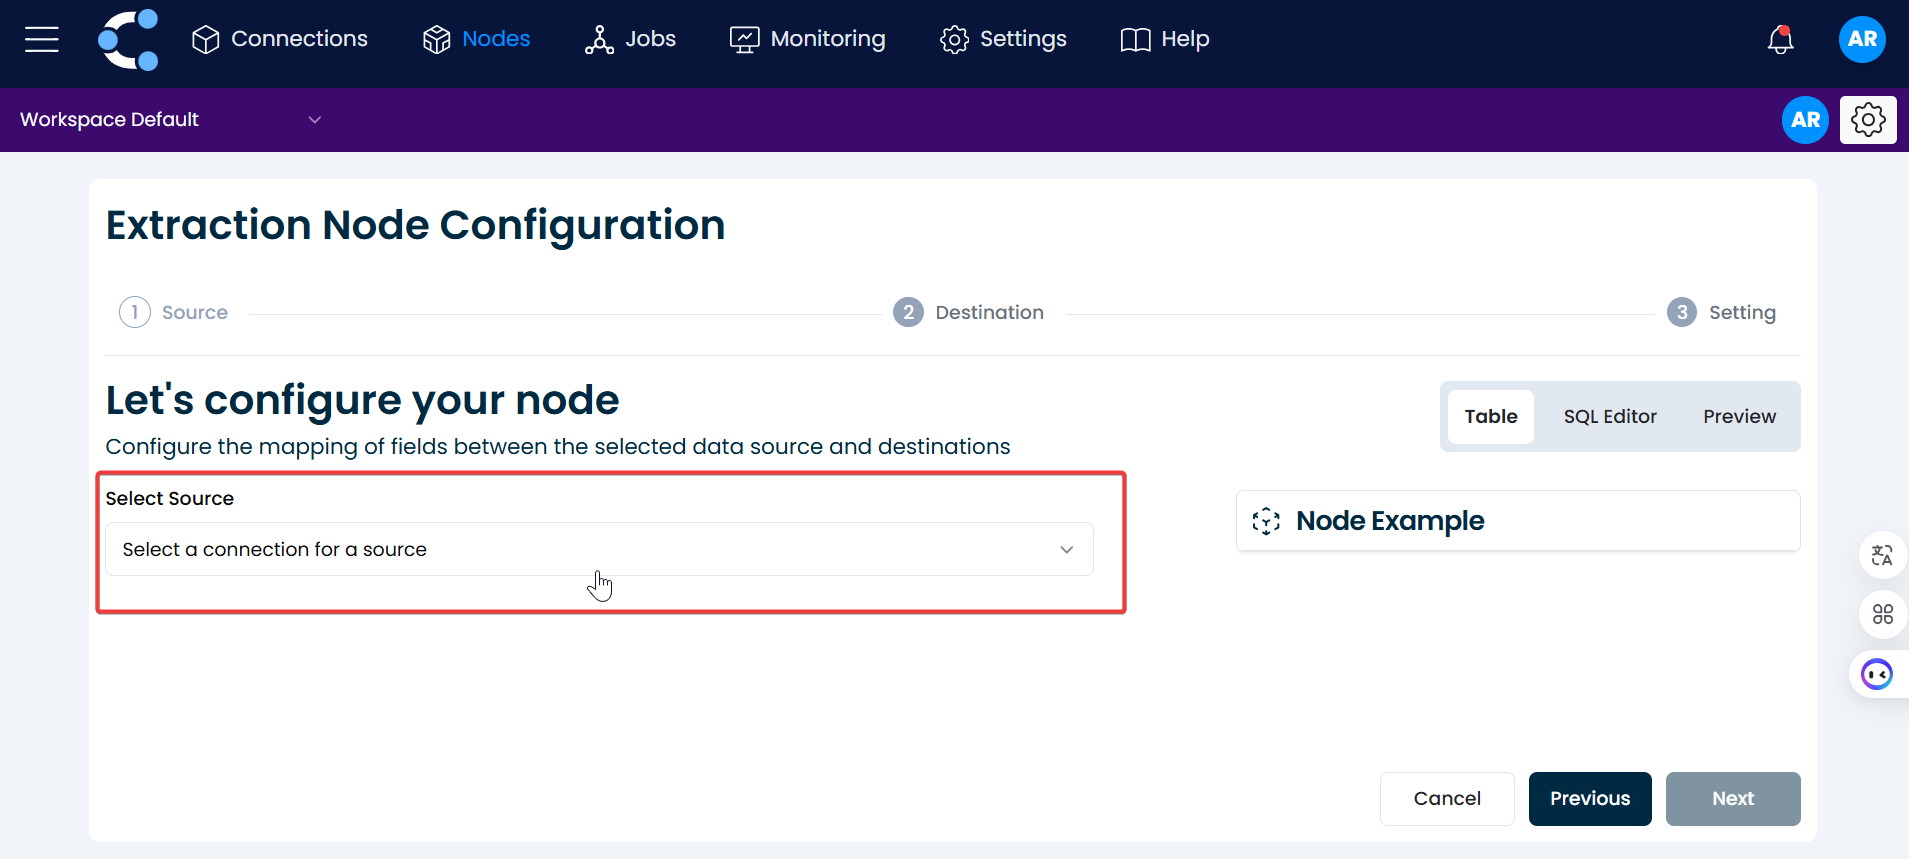
4. Select a source
Click on "Select a connection for a source" and choose a source that has been created previously.
5. Set up the node
According to the source configure the node to extract the necessary
- SAP S/4HANA
- SAP ABAP
When SAP ABAP is used as the source, the node supports multiple data extraction methods, each with its own configuration options. This gives you flexibility to access both standard and custom-developed SAP data objects.
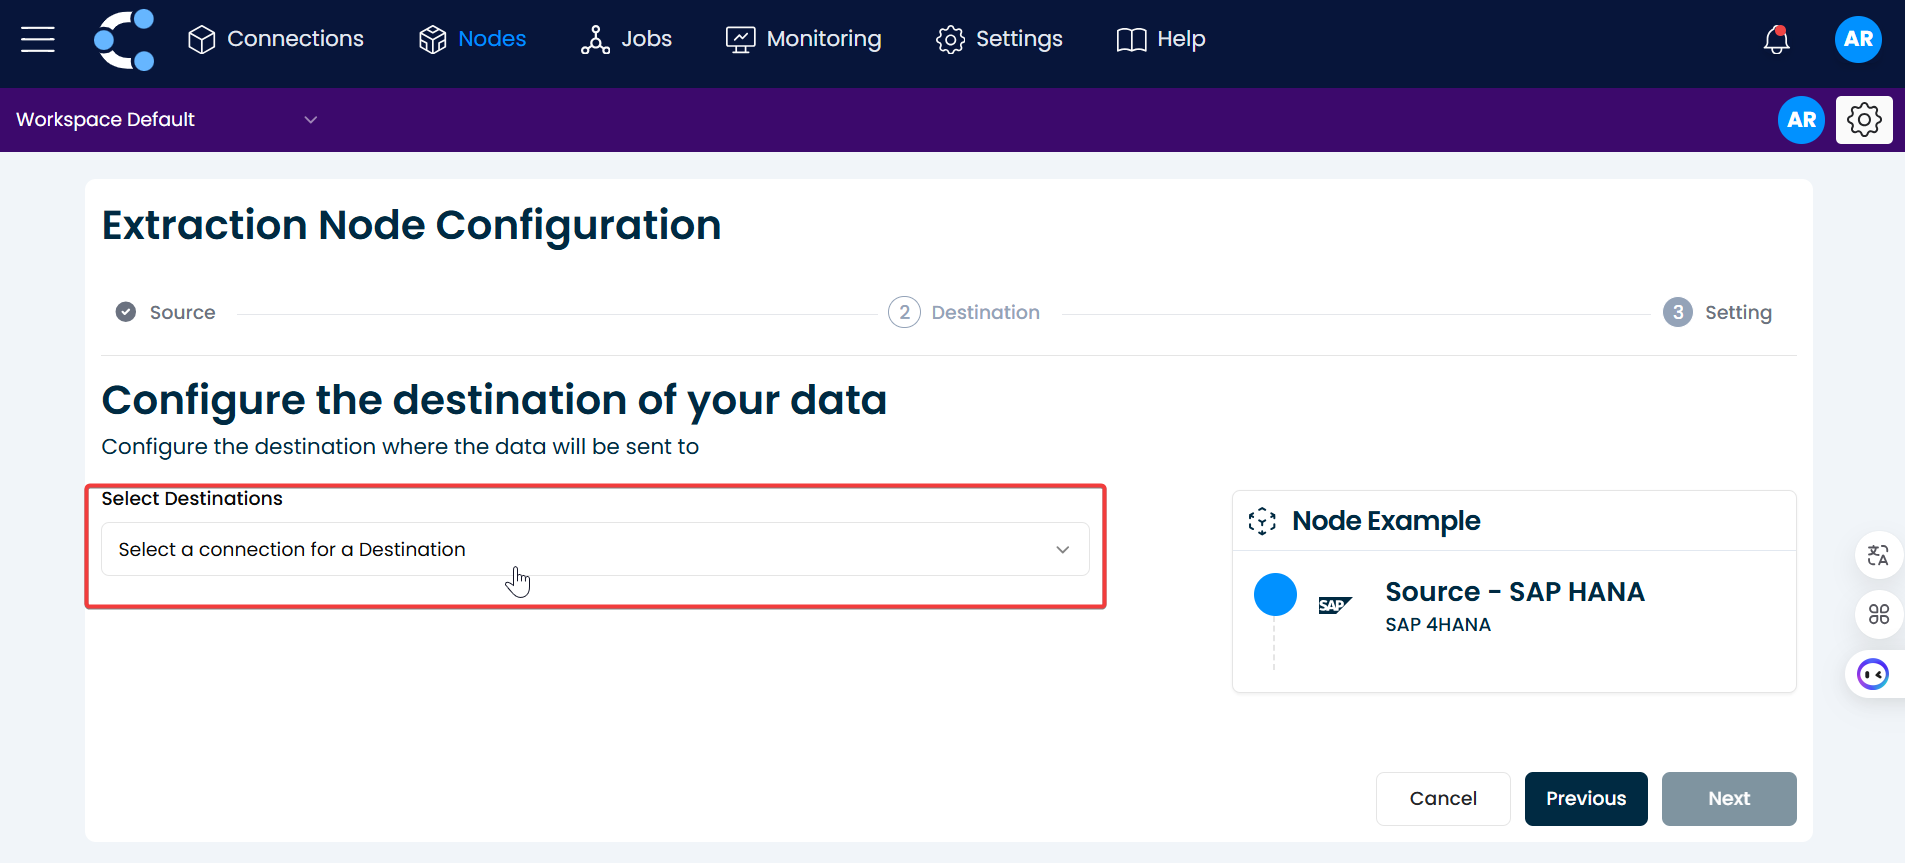
6. Select a destination
Click on "Select a connection for a destination" and choose a destination created previously.
7. Configure the output data
Once your node is connected and the source is properly configured, the next step is to define how the data will be exported to the destination.
Crestone supports two main export modes:
Choose the export mode that best fits your target system and downstream processing requirements.
8. Set the limit
Set the node limit and then click the "Create" button.
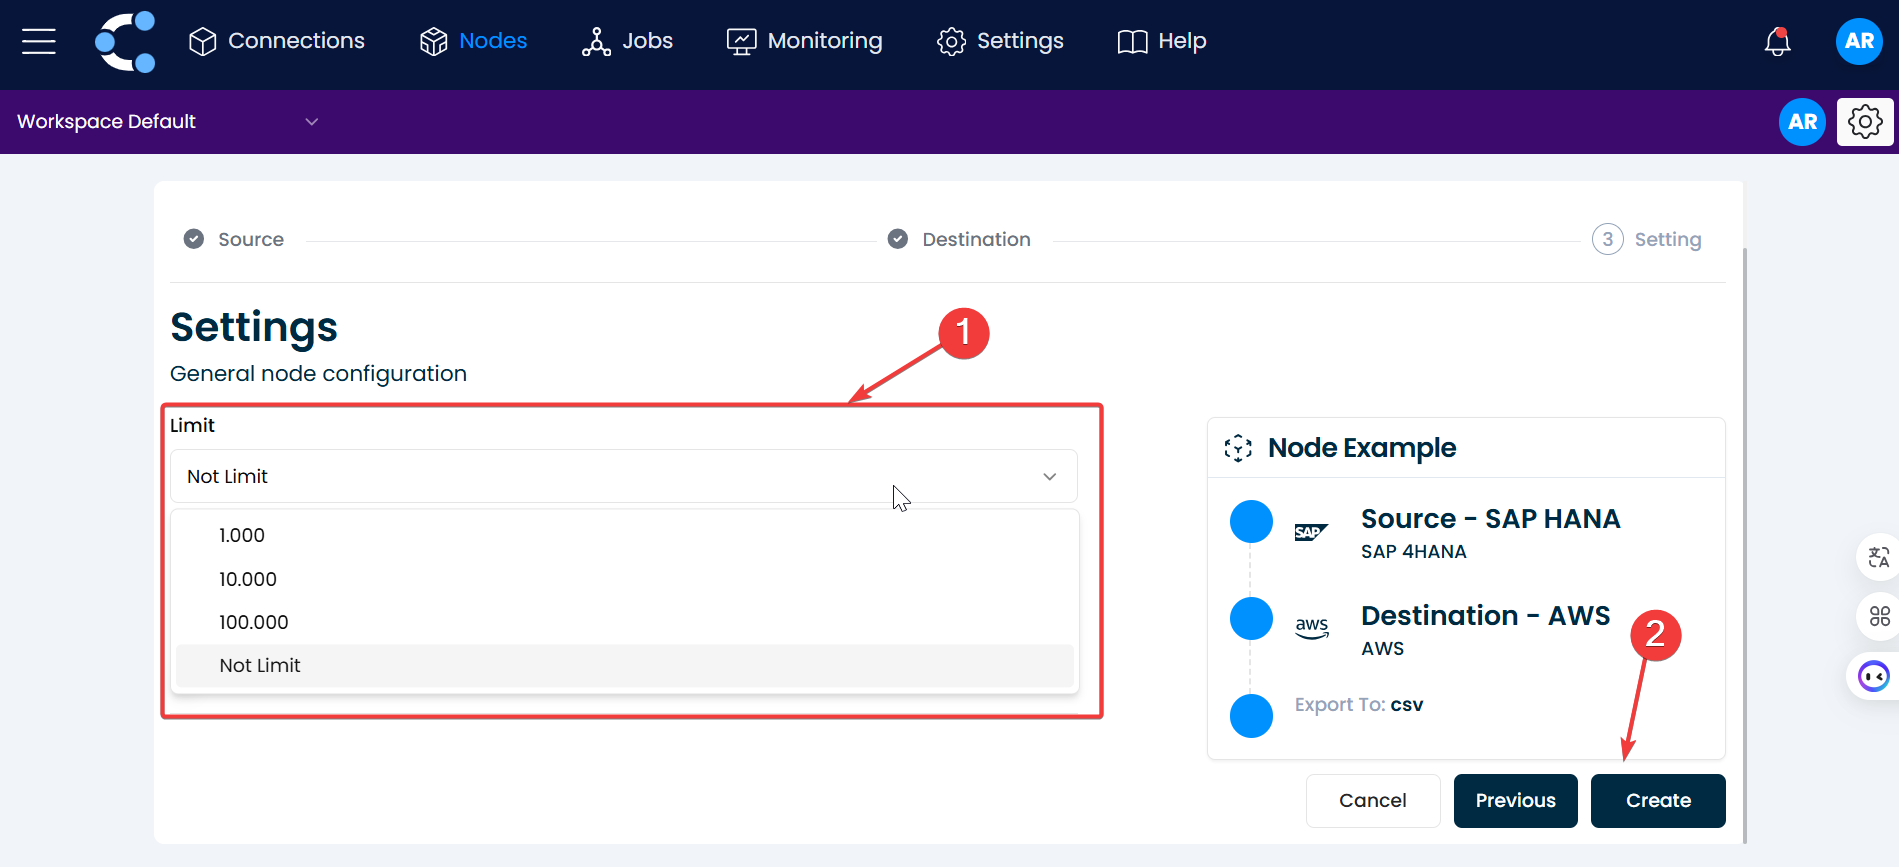
And that's it! The node has been successfully created.