Amazon S3
Amazon S3
How to create a destination with AWS S3
In this section, you will find detailed guides and useful resources for setting up and managing connections with AWS. From creating destinations to configuring credentials, we provide the necessary steps to integrate your services efficiently and securely. Explore our notes, tutorials, and more to make the most of your tools!
1. Select the destination type:
- Select the "AWS" option for the destination type.
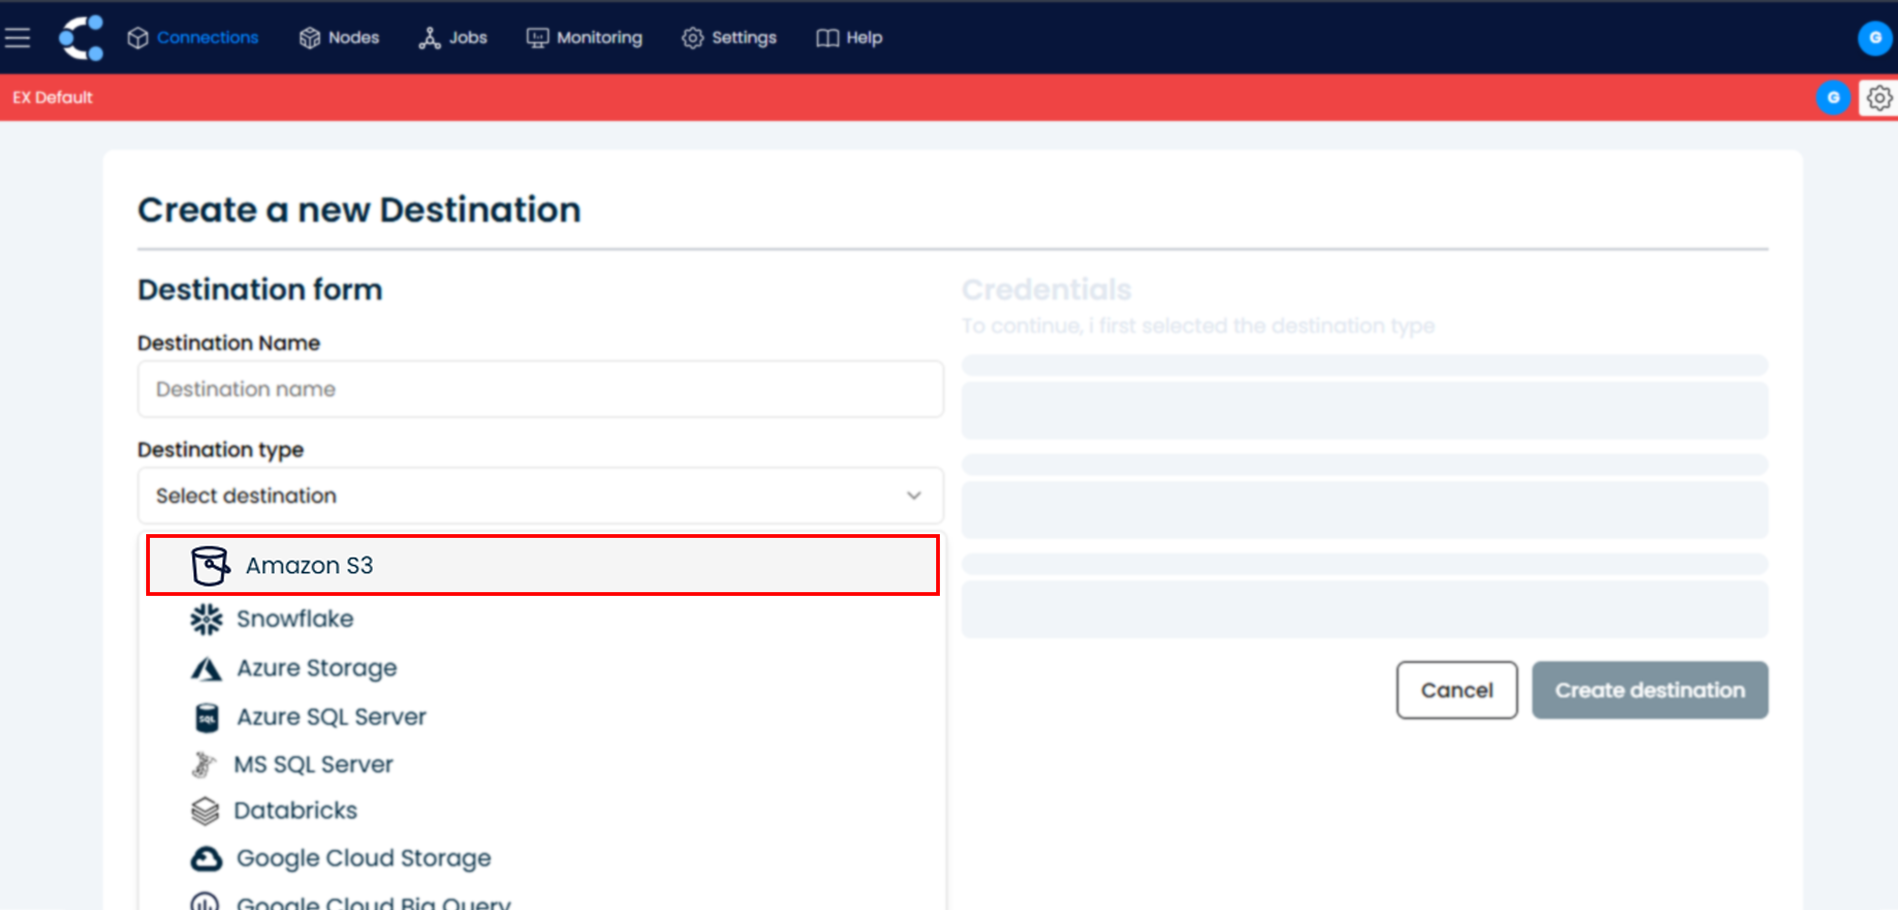
2. Enter AWS credentials:
- You will be prompted to enter the credentials needed to connect to your AWS account.
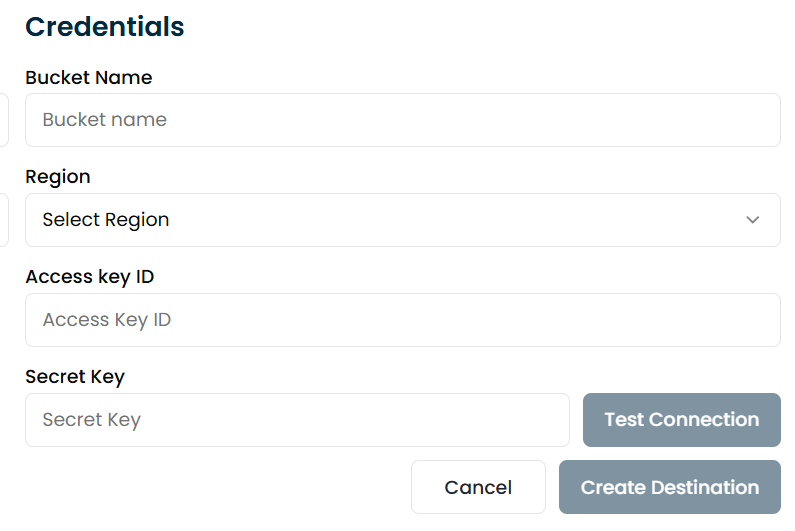
Enter the bucket name:
- Enter the name of the S3 bucket you want to use. To obtain the name, go to the AWS Console, navigate to the S3 service, and select the bucket you want to use. The bucket name will appear in the list of buckets in the console. If you don’t have a bucket, you can create one by clicking "Create bucket," assigning a unique name, and following the setup steps.
Select the AWS region:
- In the Region field, select the AWS region you want to connect to, for example: us-west-2, us-east-1, eu-west-1, etc.
- Note: It’s important to select the correct region, as AWS resources may be distributed across different regions.
Configure access credentials:
-
Access Key ID: Enter the Access Key ID for your AWS account. You can obtain this from the AWS Management Console under the IAM (Identity and Access Management) section.
-
Secret Access Key: Enter the Secret Access Key associated with the Access Key ID. If you don't have it, you can generate a new access key in the AWS Console under the IAM section.
3. Test the connection:
- Click the "Test Connection" button to verify that the connection to AWS has been established correctly.
- If the test is successful, the system will enable additional configuration options.
4. Create the connection:
- Finally, click the "Create Destination" button to establish the connection to AWS.