Windows file server
Windows file server
How to create a destination with Windows file server
1. Select the destination type:
Select the "Windows file server" option for the destination type.
2. Enter Windows file server credentials:
You will be prompted to enter the credentials needed to connect to your Windows file server account.
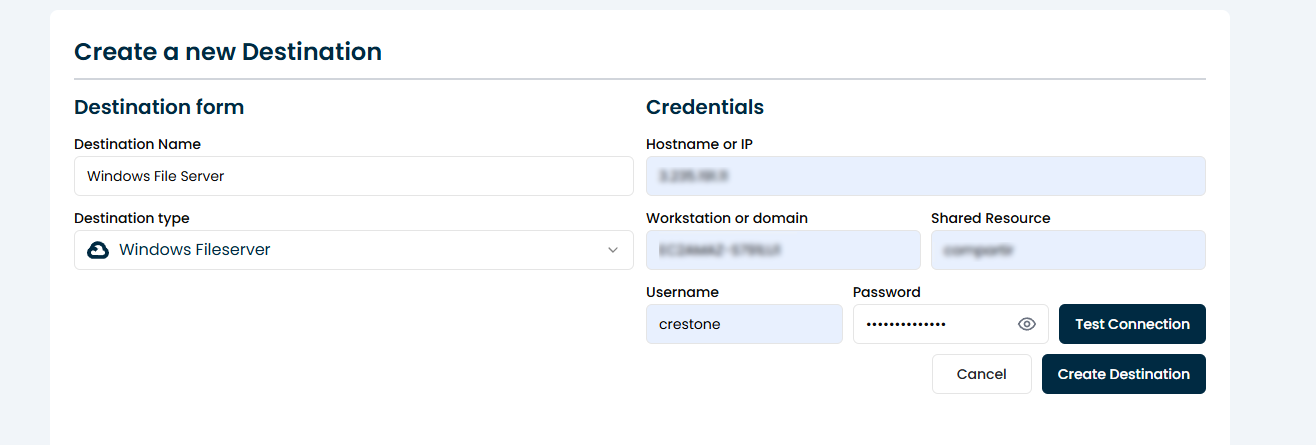
| Item | Description |
|---|---|
| Hostname or IP | IP address or DNS name of the Windows server hosting the share. Example: 3.235.191.11 |
| Workstation or Domain | Name of the domain or workgroup where the user is logged in. On Windows cloud servers (such as EC2 on AWS), it may have a name such as EC2AMAZ-..... If you are not in a domain, it can be the host name. |
| Shared Resource | Name of the shared folder configured on the Windows server. For example: share. This folder must be shared and have permissions enabled for the user. |
| Username | Name of the user with access to the shared resource. It can be a local user of the server or a domain user. Example: crestone. |
| Password | Password corresponding to the specified user. |
3 Test the connection:
Click the "Test Connection" button to verify that the connection to Windows file server has been established correctly. If the test is successful, the system will enable additional configuration options.
4 Create the connection:
Finally, click the "Create Destination" button to establish the connection to Windows file server.